I’m guessing that you probably saw yesterday’s fiasco when I tried to die my Gold Baker’s Twine using a Classic Stampin’ Pad. I’ve done it in the past but apparently forgot how long it takes to dry.
Yesterday afternoon, after the messy fiasco, I made the decision to use a few tablespoons of water and about 8 drops of Calypso Coral Ink Refill. Then I dropped about 24 inches of twine into the bowl.

After a few minutes I carefully pulled the twine from the bowl and hung it over and around a bell that hangs outside my stampin’ studio door. (The bell is rung by visitors so I don’t jump out of my chair when they walk in!)

While the twine was drying (didn’t take long!) I set up the mask and my card stock:
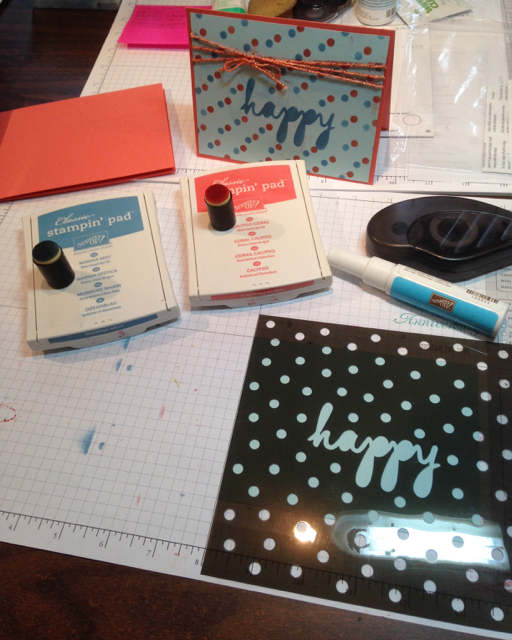
After sponging the mask openings with Marina Mist ink I moved the mask a little bit and went back and sponged the circles again with Calypso Coral ink.
 I applied about an inch of Fast Fuse on the back of the sponged card stock and secured the dry twine before wrapping it around the top of the card stock three times. Secure with Fast Fuse and cut off the tail. I took that tail, adjusted the three wraps of twine and then tied a bow with the cut off piece of twine, securing the twine placement.
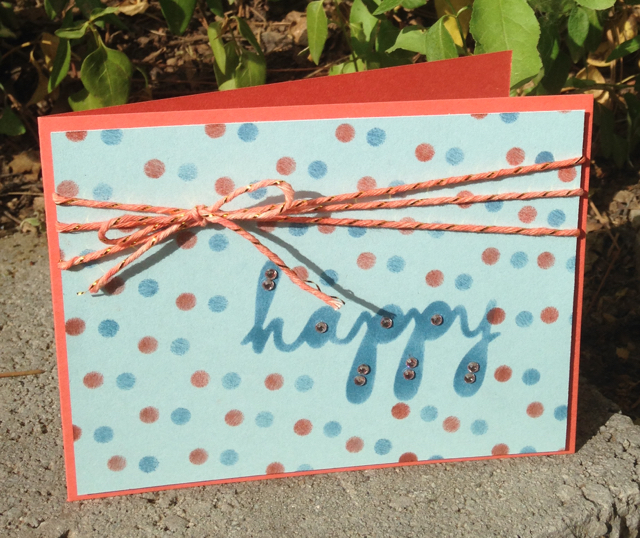 I colored the Rhinestone Jewels with my Calypso Coral Stampin’ Marker but—I know it won’t last if rubbed. Blendabilities color did cling to the jewels, but not the markers since they are water based. It’s really just for coordinating color effect right now. The Soft Sky card front layer is attached to the Calypso Coral 11″ x 4″ card front with Dimensionals.
Now, which card do you prefer?
 I think I learned a lot with ‘card 1’ on the right.
Thanks for stopping by again today. Don’t forget to check out this week’s Deals as well as the Clearance Rack. There are supposed to be some pretty good deals there! Wednesday’s new product highlights the Brick Wall Textured Impressions Folder.
I’m trying something new with my Product List shown below. I’m inserting the items in the order used rather than in “like” items in groupings. What do you think? Is it helpful at all? Remember, you can click on each item to be taken to my Stampin’ Up! store to view each item and, perhaps, make a purchase of those you’ll be needing in your near future.
Product List

|
|||

|

|
||

|

|