
Success! After some trial and error I finally worked out what is for me perfect little trays for my 3 sets of boxes. Best news is that each tray only uses half a sheet of card stock: 8-1/2″ x 5-1/2″.
 Imagine (or pretend) that this photo is clocked 90 degrees to the left so it’s vertical rather than horizontal. You need to score all four sides at 1/2″ and 1″.

Below: cut off the four outside corners as shown in the photo below. Also cut along the broken lines along the long edges, stopping the cut at the 1″ score line. Trim the side of the little piece on each corner so it fits better when the box shape is formed. Take note of where to place the Fast Fuse Adhesive along each side of the unformed box. When you tuck the corner flap in place it will be secured between the folded edges.

Below: another visual ready to be put together.

The plan for these trays is that they be 1/2″ high on all four side. By scoring at both 1″ and 1/2″ you can place the Fast Fuse adhesive on the inside and then fold the two glued edges onto each other for strength and a nice smooth “top” of all four side edges.

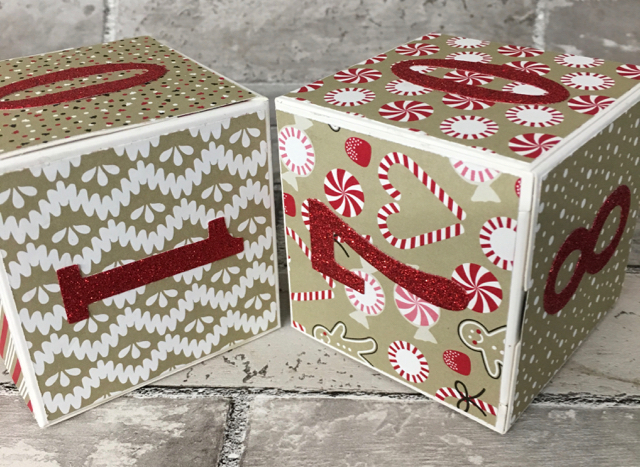
I haven’t mentioned the numbers or Designer Series Papers yet. The Designer Series Papers are cut to 2-7/8″ square pieces. Just adhere them to each side of the gift boxes using Fast Fuse or Multipurpose Liquid Glue.
I used the Big Shot and the Large Numbers Framelits for the numbers. Really! You’ll need two each of the 0, 1 and 2 and one each of the remaining numbers. In hindsight it seems you can safely place your number in the direction of the pattern of a designer paper. I didn’t, keeping exactly with the direction found on my own desktop perpetual calendar. You can see a few of my numbers being 90 degrees off from a pattern. Don’t worry about doing what I did! Here’s the number layout:


I think you can sometimes count on me to make a task harder than necessary. I just realized:
- Box 1: Numbers 0-1-2-3-4-5
- Box 2: Numbers 0-1-2-6-7-8
- Remember, the 6 and the 9 are interchangeable!
This is a far easier project that it might appear. I’ve done the hard work in troubleshooting the tray so your job, should you choose to make one or two of these, is really quite easy.
- Cut 2-7/8″ designer series paper squares – HINT: attach them to the box sides before the boxes are shaped.
- Die cut numbers and attach to appropriate sides of boxes.
- Make tray.
And you know, you could use this project, probably with different Designer Series Papers, for a year round perpetual center.
Enjoy! I had fun making them. Now I can give them to my grandchildrens’ families at Thanksgiving so they can keep watch on the approach of Christmas in the weeks to come.


